A unique and viable approach to establishing local food self-reliance and building stronger communities.

Friday, March 1, 2024

Lettuce: From Seed to Feed - Part 1: Planting

Red Iceberg Lettuce - a summer rose!
Note: Though this was originally written and posted in 2011, and some of our practices have shifted (for example we no longer use rabbit manure - or any animal by-products - in our garden or soil-mix - LINK: Making Your Own "Veganic" Potting Soil in Your Greenhouse Paths - Using Worms ) - the core of the information is still accurate and useful so we have republished without editing...This post gives generic information for starting cool-weather crops (lettuce, cabbage, broccoli, kale etc) from seed.
 
Here in the Pacific NW, we start our lettuce seed in a greenhouse in late February and then transplant the starts out in April or May when conditions allow. We're vegetarians and end up with a lot of those white, plastic, square tofu containers. We've found they make great tubs to start small seedlings. We drill holes in the bottom for drainage, fill with a good potting mix (using the bottom of another tofu tub to pack the soil firmly and make a flat surface for the seeds).

After misting the soil so it is good and damp, we sprinkle the lettuce seeds with our finger-tips trying to have a 100 or so seeds per tofu tub.  Lastly we gently sprinkle a thin lay of cover soil over the seeds and lightly mist to settle the seeds. They must be kept moist but not overly wet or the seeds and starts may rot. Lettuce seed germinates best in a cool soil so don't put it on a heat mat or under a lamp to get it to germinate.

Lettuce seedlings in a tofu container. Using a pen to make holes for transplants.
When the seedlings are about 1/2" - 1" (2 cm) high, they are ready for transplanting. We put ours in regular or "jumbo" six-packs. We use a basic, organic potting soil and add our own fertilizer. To each wheelbarrow of soil we add about two cups of all-purpose organic fertilizer and about a half-gallon of sifted rabbit manure . When germinating tiny seeds (such as lettuce), we sift the soil before adding amendments so the seedlings don't have to push past un-composted bits of bark or wood-chips in the soil. For transplanting, we don't bother to sift the soil.

Transplanting seedlings
For the Sharing Gardens, where we might grow 1,000 or more lettuce plants per season, transplanting is done in large batches. Being systematic in the nursery will save you time and materials and you will have much better results. Have labels ready so you keep track of the varieties you are transplanting. Fill a flat of six-packs and mist it with water and soak the seedlings too. Wet soil is less shocking to transplanted roots than dry. Cupping your hand over the whole tofu-tub of seedlings, flip it over and tap the bottom, catching the whole clump of soil and seedlings in your hand. Gently flip it back over and place it on a tray to catch the loose soil as it drops off.

Seedlings "hardening-off".
Using your finger. a stick or some other object, make a generous hole in each of the cells of the six-packs. Pull off a clump of seedlings and, holding them by their leaves, tease apart a single plant with its roots. On a cool, overcast day you can lay a large number of the seedlings alongside their holes before dropping them in and squeezing the soil around them. If the day is hot or the sun is strong, work in smaller batches so the seedlings don't get shocked. It is very important that all the roots go down into the soil and are covered. If they stick out from the surface, this is called 'J-rooting' and  will often kill the plants as they dry out too easily. This is why you want to dig a generously-sized hole so the rootlets don't catch on the sides as you lower them in. After pressing the soil in around each seedling, water them in gently to settle the soil. Label the tray and move onto the next.

Transplanting peas and lettuce
Depending on warmth and sunlight, and the size of the six-packs you use, your lettuce will be ready to plant in the soil in six to ten weeks. If you stagger your plantings it will mean your lettuce doesn't all come ripe at once. Ideally you wait until the root ball has filled the six-pack cell enough to hold the soil as you pop it out, without being totally root-bound (roots coming through the bottom of the six-pack). A week or two before you transplant into your garden, bring the starts outside and begin "hardening them off". Put them where they will get plenty of sun but not too much wind. They will withstand a light frost but if it is going to get very cold, or doesn't warm up in the day, bring them back into the greenhouse till conditions improve. During this hardening-off period, prepare garden beds so they are ready to receive transplants. In our "deep-mulch/minimal till" gardens, we pull a row of mulch over to the adjacent path (with a pitchfork) and, with a trowel dig a small hole just the size of the lettuce's root-ball. This leaves worm holes intact and lettuce seems to thrive without any roto-tilling needed.

Several weeks after transplanting. Picking individual lettuce leaves for salad.
Here in our area, slugs can be a real problem in the spring. Follow this link for ideas on how to re-use milk cartons or soy-milk containers to thwart off their feasting. Re-Purposing Things We don't find that additional fertilizing is necessary for lettuce plants. They receive enough nutrients from the soil. We hold off on mulching them because we want the sun to warm up and dry out the soil and mulch provides habitat for the slugs. Sometimes, after the lettuce is well established and the soil is warmed up, we mulch with a few inches of grass clippings around our plants. Let the clippings dry out for a few days on a tarp or in a bin. Fresh clippings, if piled thickly, can heat up considerably and burn your plants.

Chris Burns with beautiful lettuce harvest! 2011
We plant our lettuce spaced about 6" - 8" (12 - 15 cm) apart. We harvest them intermittently giving the remaining lettuce room to grow. In the early stages, before the heads are fully formed, we harvest one to three leaves off each plant, rather than clipping whole heads. As the heads become full size we harvest by cutting them off at the root with a paring knife, leaving the roots in the ground to feed the worms.

Fall Crops: Give yourself 45 - 60 days (before hard freezing) to grow your fall crops of lettuce. You can assist your lettuce in germinating if you begin the process in a shaded area so the soil isn't too warm. Once seedlings come up, they will need sunlight to grow but do this outside of the greenhouse so they don't get too hot. Heat triggers the plants to "bolt" (go to seed) even when the plants are very young.

Favorite varieties: Everyone who eats out of our gardens seems to prefer green lettuce to red, or at least to have some green to mix in with the red. (This even includes the bugs and sparrows who seem to devour the green lettuce much more voraciously!) Our recipients also seem to prefer head lettuce to the "leaf" lettuce. We don't know why this is (maybe just habit...) but we take this into consideration when we plant out our gardens. There are hundreds of varieties of lettuce to choose from. The most popular ones we grew this year were:

Slo-bolt (Black-seeded Simpson)
Chartwell's Romaine
Green and Red Iceberg (home-grown Iceberg lettuce is much more nutritious than store-bought).
Four Seasons (a red Romaine-type lettuce)

LINK: How to Save Your Own Lettuce Seed


Monday, February 12, 2024

Best Video on Pruning Table Grapes!

Here is the best video I've found on pruning table grapes (and I've watched a lot!). I was able to watch this video and head straight for our vineyard of 36 plants and confidently prune them for what I hope will be our most productive year yet while preparing them to be productive for next year as well.

 Grape Vine Pruning Made Easy! (Table Grapes) Using The Double Guyot Method

Update - February 2024: We followed the method outlined in the video above for our grape vines in 2023 with excellent results.

Some of the 36 grape vines we grow...after pruning.
In previous years, we had experimented with different methods of pruning. Our plants looked a lot like his did at the beginning of the video. Our theory was: the more fruit spurs we left behind, the more fruit we'd get from them. It can be a bit anxiety-producing to cut off so much plant material and reduce your grapes to just two canes and two renewal spurs (for next year's growth)! In truth, by cutting back the plants so radically, you may get fewer bunches but the ones you get will be larger and more filled out and easier to harvest.

Just a fraction of our harvest using the pruning technique outlined above.

Wednesday, February 7, 2024

A Love Like That! Historic ice storm, Pics from the Garden and Tips for Early Spring Planting

A Love Like That! 
 
Even after all this time
the sun never says to the earth,
"You owe me."

Look what happens 
with a love like that,
it lights up the whole sky.
 
-Hafiz (a Persian poet of the 1300's)

Hello friends of the Sharing Gardens - Well, after only a minor set-back from an historic double ice-storm here in the Pacific NW, we're back on track with significant plantings of early spring crops. Here's news of the storm, pictures from the garden and links to relevant posts for this time of year. Enjoy! And happy gardening!

In mid-January, southwest Washington and northwest Oregon were hit with two back to back ice-storms and several days that didn't get above freezing, with night-time lows in the teens. Heavy, steady, freezing rain just became 2" of sheet-ice in our area. Thousands of trees and branches came down, severing power lines all over the region. We were very fortunate in that we personally only lost power long enough to prompt us to try out our new hand-operated coffee grinder (slow but perfectly adequate). We heat exclusively with wood so our house stayed nice and toasty. Thousands of households lost power for days and in some cases for over a week! 

We heat exclusively with wood and insulated the whole 1875 farmhouse when we did renovations in 2014 so we stayed plenty warm. We often cook on it too.

The wildlife really suffered. We went through over three gallons of birdseed in four days (three times our usual amount) and had to use ski poles to venture out to where we feed them so we didn't slip and fall. Many types of birds that we don't usually see at our feeders showed up including varied thrushes, quail, red winged black birds and more. 

People in our area who didn't have crampons or ski-poles made make-shift traction devices by wrapping small-link chains around their boots and attaching them with twist-ties! One friend had to venture across the frozen nightmare several times a day to feed wild mallards and geese that overwinter at her pond. Another friend tried to help the deer by spreading out apples for them but the deer were having a heck of a time moving across the ice. There was no crust to break through and gain traction...just solid ice all the way to the ground.

Birds during the ice-storm. At one point I counted over 80 before they took flight and I lost count.

This view includes a big apple tree in the middle, flanked by hazelnut trees and a lilac on the right. None of our fruit or nut trees were damaged in the storms.

Thank goodness for our greenhouses! We already had carrots started in two raised beds - which did fine through the cold. We also had also just planted two-dozen potatoes, 6" underground and under a thick cover of dry leaves. These appear to be doing fine. Their greens are just beginning to emerge from the leaves.

A beautiful sunrise following the worst of the ice storms; ground is still very icy. The greenhouse on the left is called the Sunship and the one on the right is the Ark. Chris had to knock ice off both greenhouses to be sure they didn't collapse under the weight.

Chris had already started several varieties of seeds in tofu-containers. We brought them in the house during the worst of the freeze.

We often start our seeds in tofu-containers with holes drilled in the bottom. The soil in our raised beds is perfect for just scooping into the containers for starting seeds (though sometimes we sift it for really small seeds).
Seedlings (foreground/left) we brought inside during the worst of the storms and until things were consistently warm enough to return them to the greenhouse.

All the seeds that we started before the storm have now been transplanted into bigger pots. They're suffering a little bit from lack of sunlight and are a little spindly. Even though temps rose, it's been a very overcast and drizzly/rainy winter (typical for an El Nino season). Starting seeds in January was pushing things a bit for our area but even if this first batch doesn't do so well, the later batches we've started should do fine. Starting seeds early is always a gamble but it's worth it if you have enough seeds to spare. Starting Seedlings Directly in Greenhouse Raised Beds 

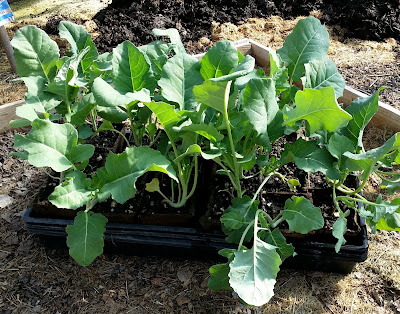
Here are many of the seedlings that have been "potted up". Cabbages and kale: six per tofu container...Lettuces do really well in egg cartons (bottom/right). The roots grow right through the cartons and each seedling can just be torn off the dozen and planted directly in the soil, egg-carton and all!

Prior to the ice storm, we still managed to host a few volunteer sessions inside the greenhouses. Here, Donn and Chris are hand-digging in bags of compost (harvested from our greenhouse paths - LINK). Chris rebuilt all the GH raised beds this winter with 2x6 lumber (much of which was salvaged). The black, plastic bags on the other beds keep moisture in the soil, keep the soil temperature warmer (for microbial action) and prevent damage from UV rays. These bags will be re-used over and over again.

Suzanne, removing greens from carrots harvested from outside beds in January.

Chris planted a long bed of carrots and beets in an outside bed in Sept. It was a bit of a gamble, starting them so late but they did beautifully. We harvested 54 pounds of delicious, sweet carrots! So tender and yummy and full of minerals. We collect plastic containers with fitting lids from our community and re-purpose them for storing our harvests. (Here the carrots are in containers for salad greens).
The beets weren't quite as productive but we still got 17 pounds. They too were very sweet and tender.

With February upon us, garden tasks will shift to pruning, turning compost piles, repairs and maintenance on buildings and equipment, along with transplanting seedlings and other tasks. If you're local and thinking you'd like to join us for the coming season, here's info about our share-giver (volunteer) program: (LINK: Volunteering and Garden Location ).

Here are timely LINKS for your own early-spring planting:


Valentines Day - Time for Pea Planting! 


Sprouting potatoes? What to do.  

Can I Speed Up Potato Sprouting?  

Do I Need to Buy Seed Potatoes or Can I Just Grow Potatoes from the Grocery Store?  


Onions - Growing From Seed - deep pots  

Onions - Growing from Seed - Using heat mats and shallow pots  

And remember...If you plant it, they will come!

Monday, February 5, 2024

Valentines Day - Time for Pea Planting!

Garden tips for Peas: In our region (Zone 8b - Last frost-date zone map - USA), its ideal to plant peas around Valentine's Day. This gives them the best head start for blooming in time for the longest possible harvest season. The problem is that, here in Alpine/Monroe, Oregon, the soil is often very wet and cold this time of year and, even if you get a good start sowing seeds directly in the soil, the March and April rains can significantly retard their growth, the seedlings can rot off at soil-level, or slugs can decimate your starts.

If you have raised beds, direct sowing shouldn't be an issue but if, like us, you don't have that luxury, what follows is a method we've used successfully for several years  to deal with these challenges. 

By starting seeds in pots and later transplanting them it will increase your chances of an early, abundant edible-pod pea harvest. 

For this method you will need a greenhouse (or indoor seed-germination set-up), and live in a similar climate as the Sharing Gardens (we're in zone 8b, according to the USDA zone map). You can start your seeds in pots much earlier than you would be able to direct sow them outside. Depending on when you start the seeds, they can be transplanted into a greenhouse for earliest pea-production, or later, to beds outside.
 
Peas, started in pots.
For plants that will be grown out in our greenhouse,
we start our seeds as early as the first week of January. These are then transplanted to greenhouse raised beds by mid-February. Seeds started in pots in mid-February can be transplanted to outside beds in March. 
 
By starting our first batch of seeds at the new year, we can be eating peas by late March and on into April - at which point the peas we plant outside the greenhouse will begin producing and carry us through May or June!

You'll need:
  • Seeds: Our favorite varieties are: Sugar Snaps - delicious pods/shorter trellis - 6' or Melting Sugar - need a tall trellis - 8' - very prolific but not as sweet.
  • Soil
  • 4" pots (4-6" deep) - the deeper pots give more time before plants become root-bound. You'll need one pot per two seeds. Plants will be transplanted at a spacing of 6"-8".
Fill pots to within a half-inch of the top. Water the soil to help it settle.

Poke two seeds, in opposite corners, about the depth of one knuckle (3/4" or so). That's two seeds per pot. This gives each plant enough soil to germinate and grow to several inches in height before you transplant. Cover the seeds with soil (about the depth of two seeds-deep) so they're not exposed to sun. Water them gently. Do not over-water. Seedlings can rot if soil is too damp.

Plant two seeds in opposite corners.Note: Since having written this article, we have now shifted to planting two seeds per pot but do not have photos to reflect this.
Keep the potted seeds protected from marauding slugs by putting them up on a table, or putting a milk-carton collar around them. (Link to post on Re-Purposing Things - including milk-cartons as collars). 
 
If you're planting in January, you'll need a greenhouse, or indoor germination set-up to protect them and keep soil in pots warm enough for germination. If you wait until mid-February, pots can be outside in a sunny place, protected from north winds. Temporarily bring them inside if faced with a severe freeze.
Pea seedlings in pots. Pea leaves and tendrils are edible and delicious in salads.

When they are at least 6", and no longer than 12", you can put them in your garden, or greenhouse beds. Best to wait until their root-systems are quite dense in the pots -- almost "root-bound". They will be easier to transplant without damaging the plants. On the other-hand, if you wait until the stems are too long, you risk breaking stems during transplanting so it's a matter of finding the right balance.
 
These peas are ready to be transplanted! In fact they're almost too well developed! Tendrils from neighboring plants are starting to entwine. Pea plants are very fragile and you must be careful not to break the stems.
Transplanting: Plant each 4" pot (with its two seedlings) about 8"- 10" apart with thin bamboo stakes or other climbing trellis in between each clump of starts. (Note: peas need a trellis with stakes or caging that is less than 1/2" (1 cm) in diameter. They climb using tendrils (instead of wrapping around the trellis - like beans) and won't be able to grab and climb if your trellis/caging uprights are too thick.)  
 
Pea-plants are not typically transplanted but sowed directly in place. They are very susceptible to shock so be gentle with the roots and stems. Best to have your trellis in place before you transplant so you don't injure roots driving in the stakes.  
 
If slugs are a big issue in your area, planting them in milk-carton collars can make a big difference. We also typically sprinkle about a teaspoon of iron-phosphate ("Sluggo") around each bunch of plants. This is an organically-approved way of dealing with slug/snail infestations in your garden. (LINK to article about iron phosphate).

The plants might go through a little stress from transplanting but once they acclimatize to their new environment they'll be well along the way to yielding a bounteous and long-term harvest!

Good idea to have trellis in place before you transplant peas (so you're less likely to damage roots). The plants will go through a little stress from transplanting but once they acclimatize to their new environment they'll be well along the way to yielding a bounteous and long-term harvest! 
John and Llyn transplanting pea-seedlings outside in early to mid-spring. It's a good idea to have your trellis in place before you transplant peas (so you're less likely to damage roots).
Sara picking peas in the greenhouse in April. Note: peas need a trellis with stakes or caging that is less than 1/2" (1 cm) in diameter. They climb using tendrils (instead of wrapping around the trellis - like beans) and won't be able to grab and climb if your trellis/caging uprights are too thick.
Pea-vines headed for the compost pile. Peas, being legumes are able to add nitrogen to your soil through a symbiotic relationship with organisms that grow on their roots. This will help improve your soil, particularly if you leave the roots in the ground when you cut down the "greens" to add to your compost pile. (Link: Saving pea seeds - a low tech method to prevent 'pea weevil' damage)
Growing food together, grows community too!


Other relevant posts for early-spring gardening:


Sprouting potatoes? What to do.

Onions - Growing From Seed

Sunday, February 4, 2024

Sprouting potatoes? What to do.

If your potatoes are growing sprouts, you have a couple of options: eat them or plant them!
There's nothing wrong with eating potatoes which have sprouted. If you're certain that you won't be planting them, knock off all the sprouts. Leaving them on the potato will cause it to dehydrate faster. If the potato has already shriveled, it's still fine to eat.

Shriveled potatoes are fine for eating.
If the potato has a little bit of green on it, just cut it off and eat the remaining spud. if it has a lot of green, it will be perfect for planting. but if you're not going to plant a really green potato, throw it out. You can put it in your compost pile but it might sprout. If it has any signs of rot, throw it out! There's almost nothing worse than the smell of rotting potatoes!
 
Potatoes that are green under the skin can be toxic in large quantities. If it's just a small spot of green, cut it out and you'll be fine. If the whole potato is green under the skin (above), it would be fine for planting...or throw it out.
 
Why grow your own potatoes? Well for one thing, potatoes are one of those vegies that are good to eat organic and buying them organic can be expensive. They are a good use of garden space as a single plant can yield up to five pounds of potatoes. Also, they're fun to grow. This article will tell you how you can turn that scary tangle of sprouting potatoes under your sink, into a meal (or ten!).

Timing: Count backwards from when you wish to harvest your potatoes. Most varieties need between 17 and 19 weeks from planting to harvest. Add another two weeks for “chitting”. Chitting is a way to help the potatoes store up solar energy which makes them more likely to produce a big crop. Exposure to indirect sun hardens the sprouts so they are less likely to break. Also, the green in their skins is bitter and discourages pests from eating your seed potatoes in the ground.
This large potato was cut and allowed to dry on the exposed side before planting.
Sprout your potatoes: Potatoes must go through a natural dormancy before they can sprout again. This can be anywhere from four to six months. UNlike most crops, they are not sensitive to day-length but have an internal timing that can only be altered slightly to suit the farmer's planting cycles. If you wish to delay sprouting, keep potatoes in a cool, dry storage area. If you wish to hasten their sprouting, increase the temperature and moisture of their storage place. Layering them in damp leaves, in a tub kept in a heated part of your house will do the trick. The ideal sprout-length is about ¾ of an inch (10-15 mm). The longer they become, the more likely they are to break when you plant them.

If your potatoes have long, hairy sprouts: If your potatoes already have extensive sprouts, and the sturdy central sprout has many small root-hairs coming off the sides, it's important that you remove those, otherwise you'll get many tiny potatoes instead of a few large ones. These smaller side-sprouts also hasten the dehydration of the potato and weaken its ability to thrive. You can rub off the rootlets with your bare hands, they snap off easily. Multiple, thick sprouts are fine; just get rid of the fine hairs.

Potatoes on left ave too many rootlets. Ones on right have been stripped and are ready for planting.
Best size for seed potatoes: The optimal size for seed-potatoes is the size of a hen's egg. If you have larger potatoes, cut them so they have at least three “eyes” and sufficient flesh. Don't let the freshly-cut sides of potatoes touch each other as this may cause them to rot. (Some browning or blackening is normal for potatoes as they "skin over".) 
 
These are a good size for planting. Note the greenish hue from "chitting".
Chitting your potatoes: You can chit potatoes in your house near a window, or on a covered porch, or in a greenhouse (under a table). Don't put them in direct sunlight and, if there's danger of frost, cover them with a towel or cloth at night or bring them inside. After they have "greened up' a bit, and any cut parts have sealed over, they are ready to plant. 
 
Here are potatoes on a covered porch where they get indirect light.
Green potatoes are mildly poisonous so don't eat them after chitting.

If you have chitted your potatoes and its still too early to plant (the ground is too soggy or there's still snow on the ground) you can store them in a cardboard box or plastic tub, layered between leaves from last fall. You can also use straw. Or follow this link to an innovative way to extend the growing season of your potatoes. Link. We haven't tried this but it seems like it would work.

Some of our 2009 harvest, with seed potatoes stored in a paper sack (on the right).
How many potatoes should you plant? Depending on the variety, you can get five or more pounds of potatoes for each one you plant. You'll need about a foot between each plant in your garden and potatoes like lots of sun and loose, sandy soil. 

Links to our other potato blogs, go to:

"Chitting" Potatoes
How to Plant Potatoes 
Planting Potatoes in Clay Soil

Saturday, February 3, 2024

Onions - Growing From Seed - deep pots

There are literally hundreds of varieties of onions grown in this world, but unless you grow your own you usually have access to only a handful of varieties from the grocery store.  If you rely on growing onions from ‘sets’, (the little onions available from nurseries with about a hundred per bag) your options are often still quite limited.  Growing from 'sets' has other disadvantages too; often they will produce a significant number of ‘doubles’ (meaning smaller onions at harvest-time) or they go to seed, 
which makes them tough and unpalatable.   
Here is a guide you can follow that will ensure your success at growing onions from seed.

Onions going to seed.
Here in the Willamette Valley of Oregon (USDA Zone 7b - Link to finding what zone you are in), we do best to grow what are called ‘long day’ varieties which include Cipollini (chip-o-leenie) both red and yellow varieties, Southport White Globe,  or White and Yellow Sweet Spanish. There are many more varieties to choose from; check your seed catalogs or go online to see a greater selection. (Be aware that, if you wish to save your own seed, you must choose Heirloom/Open Pollinated non-hybrid seeds. Those listed above are all Heirloom varieties.)

You will need:
  • Sifted potting mix
  • Sand (optional)
  • Pots: 4"-wide x 6"-deep (1 pot per 25 seeds)
  • Seeds; start with fresh seeds each year; onion seeds lose viability within one or two years.
  • Greenhouse or grow-lights, or the ability to bring seedlings indoors if in danger of frost.
  • Plant-mister  
When to start: About eight-to-ten weeks from the time you wish to transplant them into your garden. We always get the seeds started around the middle of February. By late April the seedlings will be ready to set out into the garden.  They are ready when you can see a clearly defined "bulb", 1/8" to 1/4" pushing above the soil-surface in the pot. At this stage, the sooner they get into the ground the larger your onion bulbs will be at harvest time.  It’s always a good idea to have a bed in mind that you’ve prepared during the previous fall since it’s difficult to prepare beds in the spring if you have a long rainy season like we often experience here in Oregon. The seedlings can handle a touch of frost at this stage but its no fun transplanting them in really muddy garden beds. Some people wait until early or mid-March to start seeds and still have plenty of time for the onions to ripen.

Pots: We've found that starting the seeds in pots that are 4" - 6" deep is best. Any shallower and the seedlings become root-bound before it's time to transplant them.

Soil/Sand: Start with a good organic seed-starting mix.  It doesn’t need to be a premium potting blend, in fact, if you start with too rich of a soil blend you can experience a condition referred to as ‘damping off’ which looks like mold growing on the surface and which causes the young seedlings to rot as they emerge from the soil.  One way to help eliminate this condition is to sprinkle a thin layer of sand over the seeds.  By keeping the soil damp but not too wet and having good ventilation you shouldn’t have this problem. 

Onion seeds can be started in a variety of containers.
Fill the pots with a sifted soil to about 1/2" from the top (tiny seeds find it difficult to germinate in soil with large chunks of material). Level out the soil, tamping them down with the bottom of another pot to create a level surface so that all of the seeds will be sewn at the same depth (otherwise they germinate unevenly). 

Seeds: You may want to actually count out the seeds the first time so that you can have an idea of what 25 - 35 seeds looks like because that is about how many would be optimal to sew in 4" pots.  You can adjust up or down depending on the size container you choose.  The idea is to not have an overcrowded condition that would produce weak and unhealthy seedlings.  Place the seeds in the palm of your hand and pinch out a few at a time. Gently drop them on the surface of the soil, distributing them as evenly as you can without becoming too concerned about accuracy.  It’s OK if some seeds are touching each other. Sprinkle a sifted layer of starting mix or sand over the seeds at a depth of about an eighth to a quarter inch.  Tamp it down again and water gently (a planter mist-er works great at this stage). 

Watering:  Keep the soil moist using either a small spray bottle or water them from below by putting water in trays and setting pots in them. Tiny seeds, until established can be washed away with more aggressive watering techniques. Make sure you label them with the name of the variety and the date you started them.  Then it’s time to be patient, and let Nature do her work.

The seeds will not require sunlight until they have emerged from the soil, usually about two weeks from the time they are sewn, so you can keep them indoors where they will not freeze, on a window sill or in a greenhouse if you have one. Once the greens are up, they will require full sun. If you don't have grow-lights or a greenhouse, be sure to bring them inside at night if it looks like you may have freezing temps.

Teasing onion-roots apart before trimming.
Transplanting: Each pot of seedlings must be teased apart. You will need to trim back both the tops and the roots before trying to stick these tiny seedlings into the ground. You trim the roots so they're easier to slip into the holes and you trim the tops so that the pruned roots can support the greens above.

First, dump the whole pot into the palm of your hand.  Next, separate the clump into several sections (maybe 10-12 seedlings in each clump).  Hold one clump by its 'greens' and gently tap the root ball until most of the soil has fallen away.  Tease the seedlings apart and lay them back in your hand so that the small bulbs are in a line (see picture below). Using a scissors or hand pruner, cut away all but about 2 inches of the roots.  Trim the tops to about the same length as the roots. Now set the clump into another shallow container with a little water in the bottom to keep them from drying out while you prepare the rest for transplanting.  Prepare only as many as you are able to set out in one session.

Trim roots and greens to same length.
In the bed that you’ve already prepared you open up small holes about 4-5 inches apart. Our onions are usually planted in beds two to three feet wide, with several rows in each bed.  

Make holes: To make the holes you can fashion a planting stick called a ‘dibble’ from a smooth branch or a ¾ in dowel with a point, or, just use a ‘Sharpie pen’ to make the hole.  Make a number of holes and then go back and drop a single onion in each hole.  Gently press the roots into the hole and pinch the soil around each one, making sure the part that was under the soil in the pot is covered when you transplant leaving only the green top showing.  You’ll get the hang of it after a few and will be able to transplant hundreds in no time at all!

Onions in a wide bed.
Now the focus becomes keeping the bed weed-free and well watered.  Once the plants have become established and the warmer, sunny weather settles in you’ll be amazed at how fast everything grows.  Feel free to thin out your onions when they are immature and be sure to use the whole thing, greens and all. 

If you have planted non-hybrid seeds, hold back a few onions to replant next spring to save seed. Onions are biennial meaning they don't produce seed till their second year. By collecting your own seeds you can begin the process all over again, and saving seeds, dear friends, is one big step toward greater food security!

Link to another post we wrote about onion-growing.
The Sharing Gardens is a registered non-profit and tax-exempt organization. We exist primarily through donations. If you have found benefit from our project or our site, please consider making a small donation through PayPal. (Click button below.)